
PRESENTS
ROS Developers Live Class n71

How to visualize sensor data in ROS2
In this class, you will learn how to visualize sensor data in ROS2
But, why is so important to learn this topic?
We also know that the migration to ROS2 is alredy happening, and it's so important to get on it. Visualizing sensor data is very important in order to see how the robot is reacted with its environment. we know that the sensors are for the robot what the senses are for humans, in this way it is how the robots obtain data from their environment and can interact with it, visualizing the data that these sensors provide will allow us to evaluate as if the robot is interacting properly and analyze the process of control and decision making to perform an action. In ROS2 we have RVIZ2 that will help us to visualizing all the information of what our robot perceives and in wich way, publishing the topics of this robot in a graphical environment, like RVIZ in ROS1.
This rosject has been created by Christian Chavez and Ricardo Tellez from The Construct. You can use this rosject freely as long as you keep this notice.
REQUIREMENTS :
- Basic Knowledge of Linux
- ROS1 Basics
- Basic Knowledge of c++ ... That's it! Let's go!
In this class, we'll learn:
- How to visualize sensor data in ROS2 using RVIZ2
Why this class?
If you are interested in becoming a Robotics Developer you will need to know how to represent the robot structure in the proper way so you can program it with ROS.
(To know more about becoming a robotics developer, read this guide about How To Become a Robotics Developer)
How to use this ROSject
A **ROSject** is a ROS project packaged in such a way that all the material it contains (ROS code, Gazebo simulations and Notebooks) can be shared with any body using only a web link. That is what we did with all the attendants to the Live Class, we shared this ROSject with them (so they can have access to all the ROS material they contain).
Check this webinar to learn more about ROSjects and how to create your own ROSjects.
You will need to have a free account at the ROS Development Studio (ROSDS). Get the account and then follow the indications below.
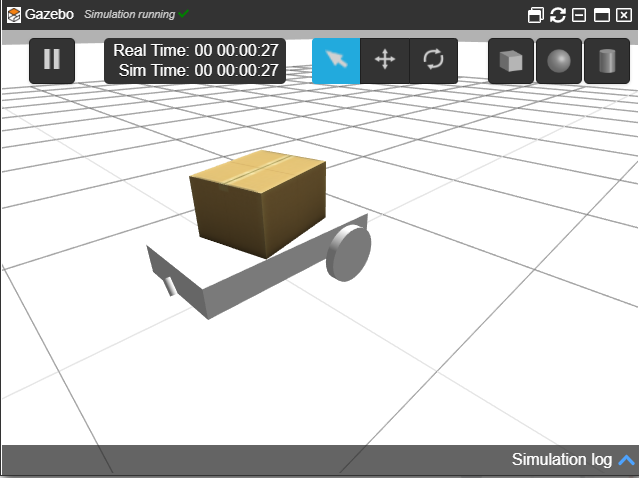
Robot for today's Live Class
Today you're going to use a robot dolly from chapulina (Louise Poubel, from Open Robotics), the git is the next link https://github.com/chapulina/dolly.
Creating a package in ROS2.
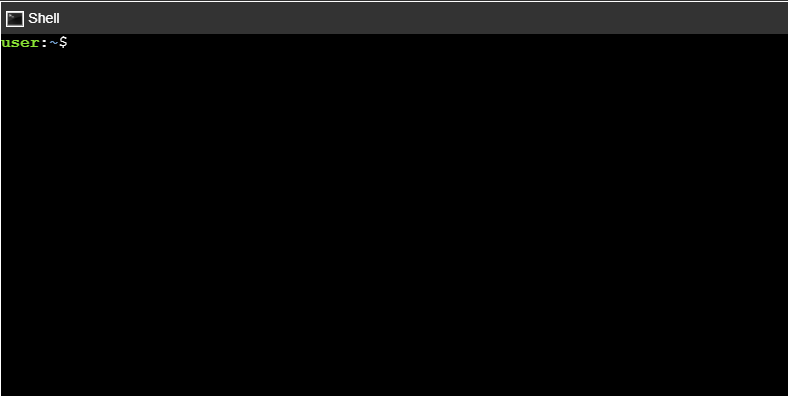
To work with ROS2 it's important use the source of your ROS2 version. In this particular case we use ROS2 Dashing. Open the Shell and run the next line.
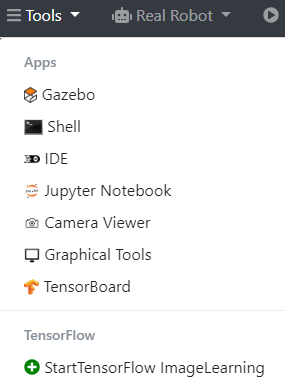
In order to open the shell go to the Tools menu in the top left of the window and select Shell
you will see something similar to the next image.
Source dashing
$ source /opt/ros/dashing/setup.bash

You will see something similar to the image shows before, now we can use commands from ROS2 in this particular Shell (it's important to know that you have to execute this command to each Shell that you will open to work with ROS2)
But why do we need to do this if we're using ROS2 Dashing?
As you already know, ROS2 is very young in comparison with its older brother ROS1. Because of this, there are still many packages and simulations that are not yet available for ROS2. Thankfully, we have the ROS1 Bridge to fill in these gaps.
Basically, the ROS1 Bridge provides a network bridge that enables the exchange of messages between ROS1 and ROS2. This way, we are able to use packages or simulations that are made for ROS1, in ROS2.
Anyway, don't worry too much about this right now we won't use it today. You can go into our academy if you want to learn more about it. https://www.robotigniteacademy.com
ros2 pkg create
As you see when we launch the simulation of ROS1 we use the command roslaunch, with ROS2 the key word will be ros2, one of these command is to create a new package. Let's do it!
In the Shell that is already open and you have runned the source, execute the following command.
$ cd ros2_ws/src/
As we saw before, it's important to create our packages of ROS2 in this direction. Now run the following code in order to create a new package in ROS2
$ ros2 pkg create my_package --build-type ament_cmake --dependencies rclcpp
Here is the structure of the command, it will help you to understand better what does this command do.
ros2 pkg create <package_name> --build-type ament_cmake --dependencies <package_dependecies>
In this particular case our package will be called my_package and will have the dependencies rclcpp in case we will work with c++ language.
If you go to the IDE tool you will see that the folder has been created, and it looks like this.
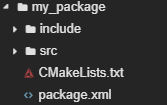
Inside my_package folder create a new one with the IDE tool and call it launch
And inside launch folder create a file and call it simulation.launch.py
If you remember the launch file of ROS1 was in XML format, and it ends with the extension .launch, in this case it's a python file that's why it ends with the py extension.
Inside the file copy the following code. This code is a variation of the dolly.launch.py from dolly_gazebo/launch found in the git that we mentioned earlier https://github.com/chapulina/dolly.
# Copyright 2019 Louise Poubel
#
# Licensed under the Apache License, Version 2.0 (the "License");
# you may not use this file except in compliance with the License.
# You may obtain a copy of the License at
#
#     http://www.apache.org/licenses/LICENSE-2.0
#
# Unless required by applicable law or agreed to in writing, software
# distributed under the License is distributed on an "AS IS" BASIS,
# WITHOUT WARRANTIES OR CONDITIONS OF ANY KIND, either express or implied.
# See the License for the specific language governing permissions and
# limitations under the License.

"""Launch Gazebo with a world that has Dolly, as well as the follow node."""

import os

from ament_index_python.packages import get_package_share_directory
from launch import LaunchDescription
from launch.actions import DeclareLaunchArgument
from launch.actions import IncludeLaunchDescription
from launch.conditions import IfCondition
from launch.launch_description_sources import PythonLaunchDescriptionSource
from launch.substitutions import LaunchConfiguration
from launch_ros.actions import Node
from launch.substitutions import ThisLaunchFileDir


def generate_launch_description():

    pkg_gazebo_ros = get_package_share_directory('gazebo_ros')
    pkg_dolly_gazebo = get_package_share_directory('dolly_gazebo')
    pkg_my_package = get_package_share_directory('my_package')

    # Gazebo launch
    gazebo = IncludeLaunchDescription(
        PythonLaunchDescriptionSource(
            os.path.join(pkg_gazebo_ros, 'launch', 'gazebo.launch.py'),
        )
    )

    # Follow node
    follow = Node(
        package='my_package',
        node_executable='dolly_follow',
        output='screen',
        remappings=[
            ('cmd_vel', '/dolly/cmd_vel'),
            ('laser_scan', '/dolly/laser_scan')
        ]
    )

    # RViz
    rviz = Node(
        package='rviz2',
        node_executable='rviz2',
        condition=IfCondition(LaunchConfiguration('rviz'))
    )

    return LaunchDescription([
        DeclareLaunchArgument(
          'world',
          default_value=[os.path.join(pkg_dolly_gazebo, 'worlds', 'dolly_empty.world'), ''],
          description='SDF world file'),
          DeclareLaunchArgument('rviz', default_value='true',
                              description='Open RViz.'),

        gazebo,
        follow,
        rviz

    ])
Well but how is a python file we have to give it some permissions to execution. so run the following commands in the shell.
$ cd my_package/launch
$ chmod +x simulation.launch.py
if you run the ls command you will see that the file changes its color into a green, that means that now it's and executable file

We have to make just another change. In the IDE tool go to ros2_ws/src/my_package/ and open CMakeLists.txt and change it like you will see bellow. This code is in base of the CMakeList.txt from dolly_gazebo found in the git that we mentioned earlier https://github.com/chapulina/dolly.
You should have something similar to this.
cmake_minimum_required(VERSION 3.5)
project(my_package)

# Default to C99
if(NOT CMAKE_C_STANDARD)
  set(CMAKE_C_STANDARD 99)
endif()

# Default to C++14
if(NOT CMAKE_CXX_STANDARD)
  set(CMAKE_CXX_STANDARD 14)
endif()

if(CMAKE_COMPILER_IS_GNUCXX OR CMAKE_CXX_COMPILER_ID MATCHES "Clang")
  add_compile_options(-Wall -Wextra -Wpedantic)
endif()

# find dependencies
find_package(ament_cmake REQUIRED)
find_package(geometry_msgs REQUIRED)
find_package(rclcpp REQUIRED)
find_package(sensor_msgs REQUIRED)

if(BUILD_TESTING)
  find_package(ament_lint_auto REQUIRED)
  # the following line skips the linter which checks for copyrights
  # uncomment the line when a copyright and license is not present in all source files
  #set(ament_cmake_copyright_FOUND TRUE)
  # the following line skips cpplint (only works in a git repo)
  # uncomment the line when this package is not in a git repo
  #set(ament_cmake_cpplint_FOUND TRUE)
  ament_lint_auto_find_test_dependencies()
endif()
add_executable(dolly_follow src/dolly_follow.cpp)
ament_target_dependencies(dolly_follow
  "rclcpp"
  "geometry_msgs"
  "sensor_msgs")

install(TARGETS
   dolly_follow
   DESTINATION lib/${PROJECT_NAME}
 )

install(DIRECTORY
  launch
  DESTINATION share/${PROJECT_NAME}/
)
ament_package()
Now let's build the package
Build the package.
Now to build the package ROS2 works with colcon, and it's an important difference between ROS and ROS2, as ROS uses catkin_make now ROS2 works with colcon as you will see now.
In the Shell run the following code, because is important to make the command in this folder
$ cd ~/ros2_ws/
Now run the next command in the shell
$ colcon build --symlink-install
this will build all the packages in your workspace. Once you have already built let's source the ros2_ws using the following command
$ source ~/ros2_ws/install/setup.bash
Launch the robot simulation
In order to visualize the person just run the following code into a shell.
$ cp -r /home/user/ros2_ws/src/dolly/dolly_gazebo/models/casual_female/ /usr/share/gazebo/models
Remember that now the key word is ros2, well, to launch a file you need the command ros2 launch and you will use it like the following command.
$ ros2 launch my_package simulation.launch.py
As you see it's similar to ROS1 it follows the same structure ros2 launch (the name of the package) (the name of the launch file)
Let's open Gazebo in the Tools menu and see the simulation
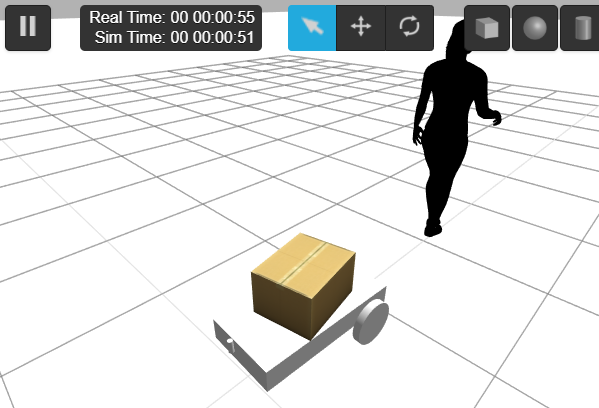
While this simulation is running let's open Graphical Tool to see the TF of the robot and see the laser data
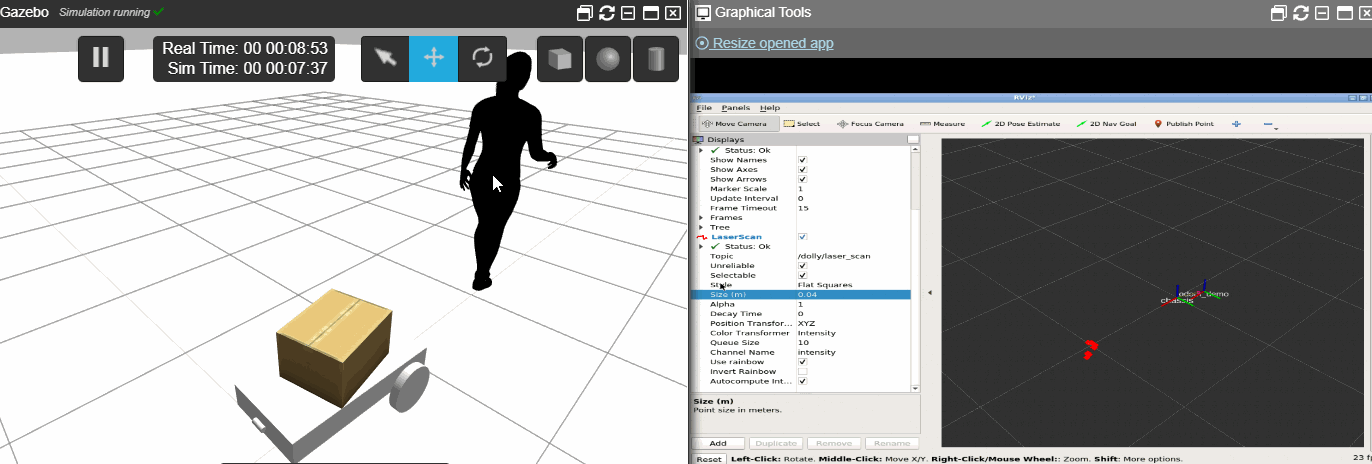
Visualizing sensor data in RVIZ2
Go to the Graphical Tool and you will see something similar to the next image.
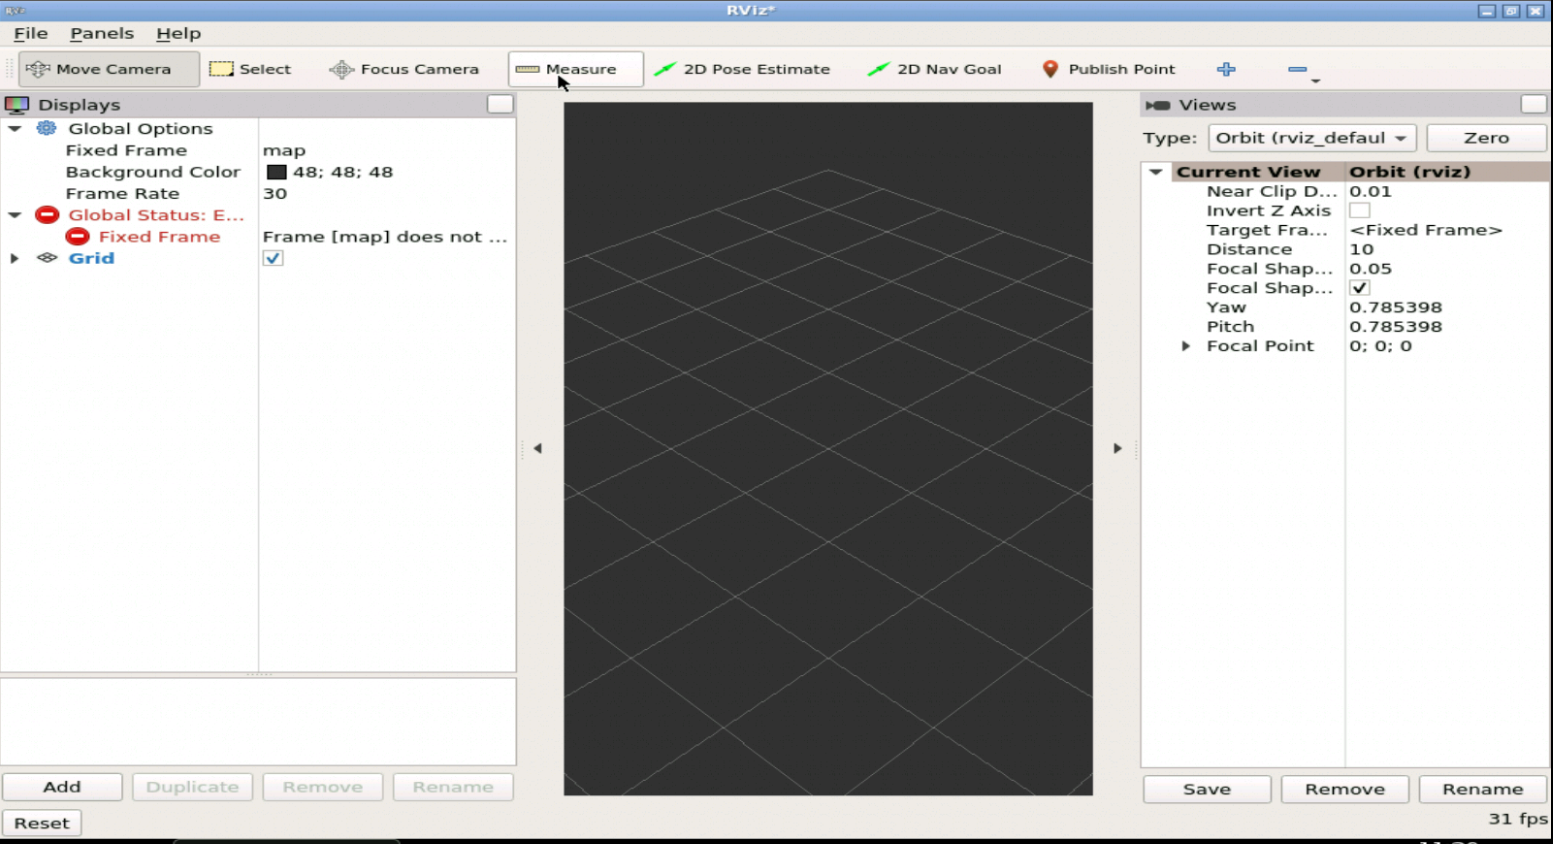
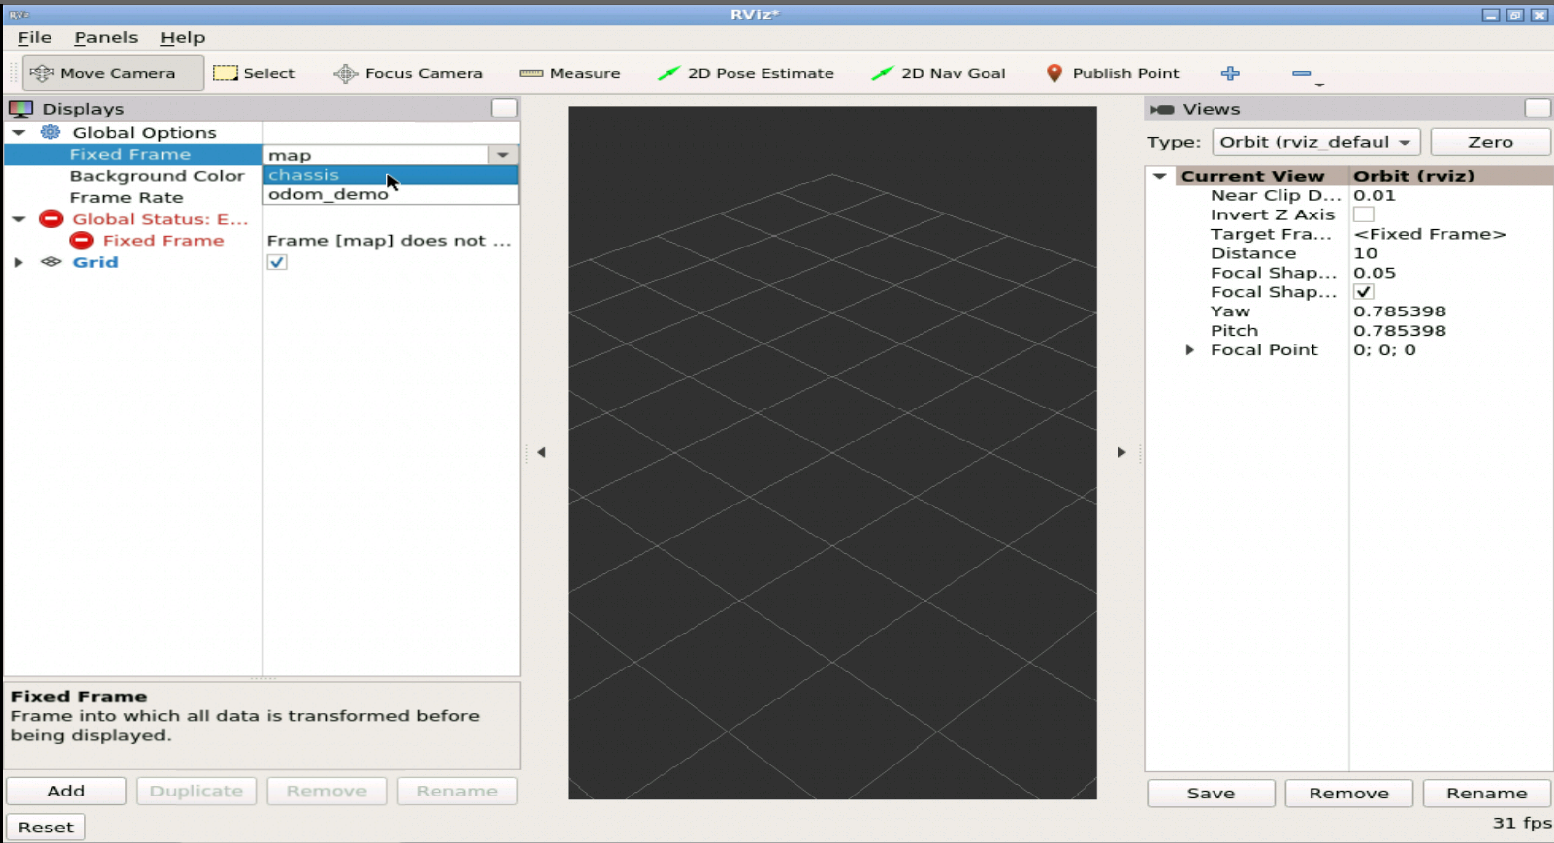
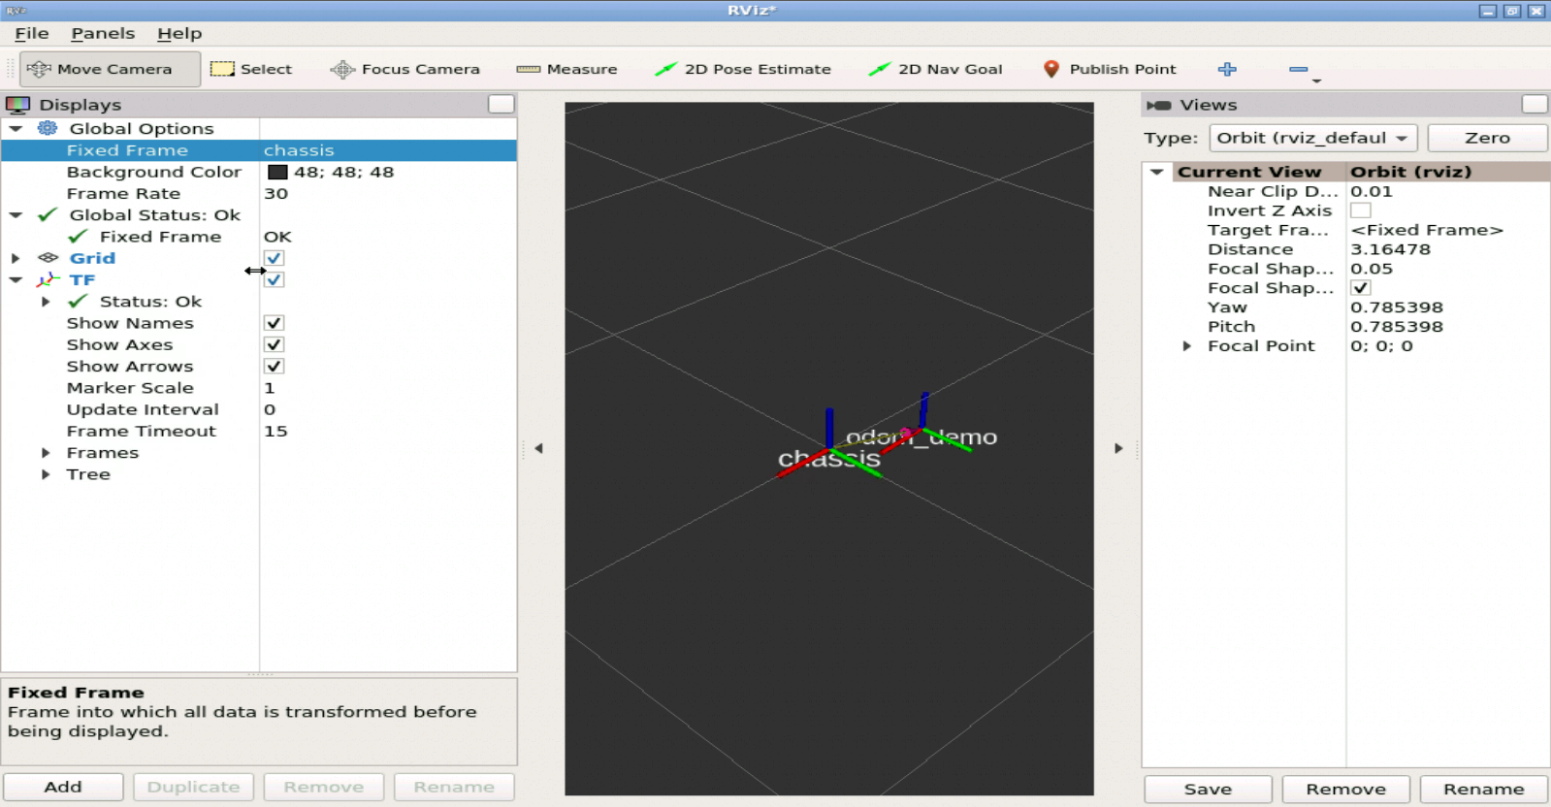
As you can see RVIZ2 is opened, now it's your turn to set up RVIZ2 in order to see data of laser scan and the TF of the robot. First let's stablish the fixed frame, in this particular case would be chassis, that is like the base_link of other robots, this frame could be other in case that you have a map or other frame , but is not this case, we're not working with navigation or something similar yet.
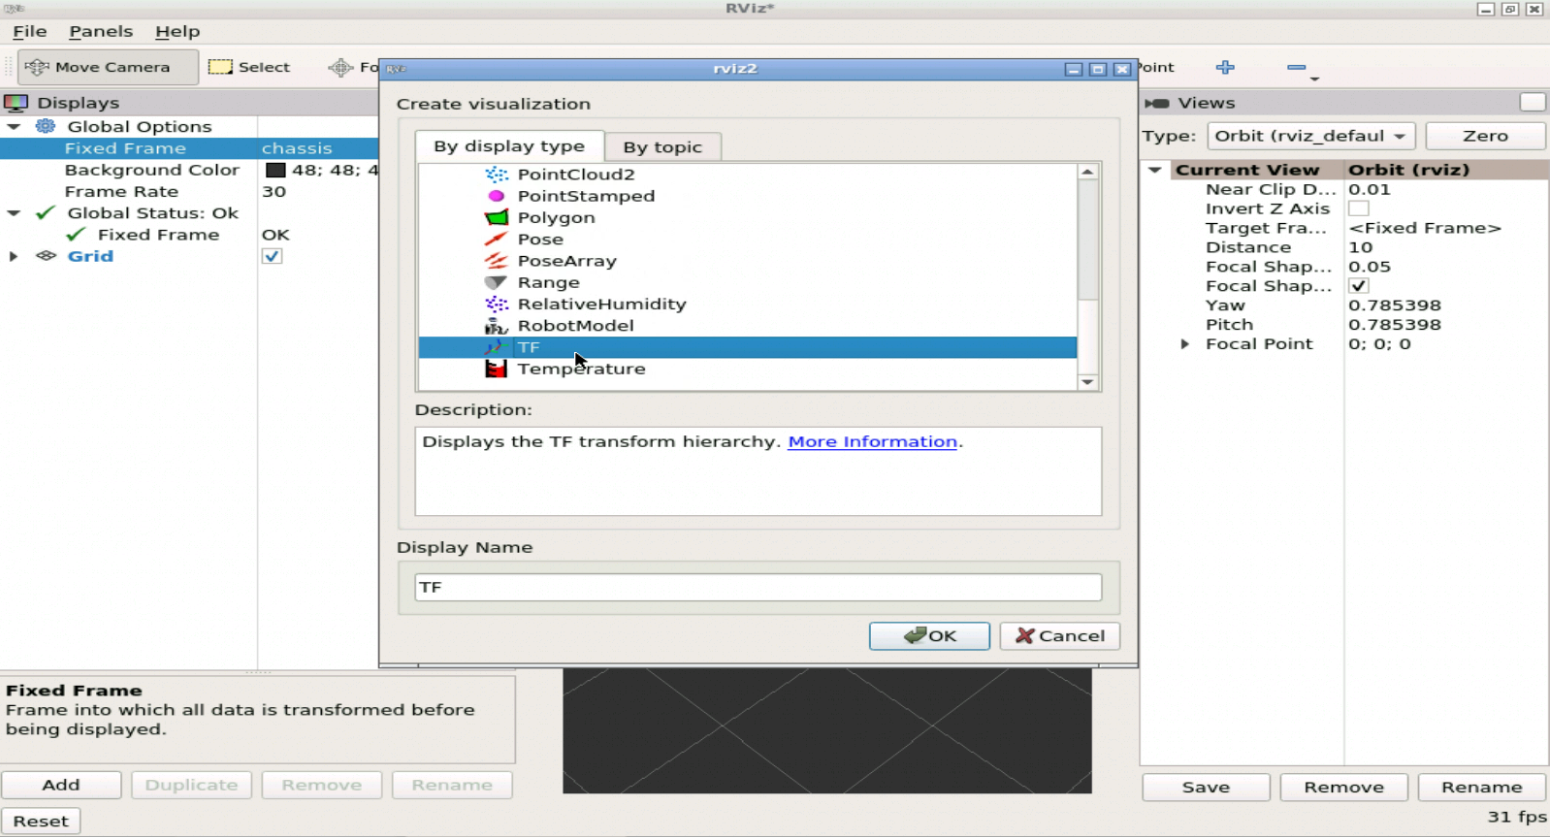
Now let's add the TF of the robot, at the bottom left you can find the button of add, then select the TF like the following image.
You can check Show Names in order to see wich tf is from each frame, remember that our chassis would be fixed, so you have to be aware of the perspective and how it moves.
Now let's add the LaserScan data, in the same way we added the TF , select the LaserScan.
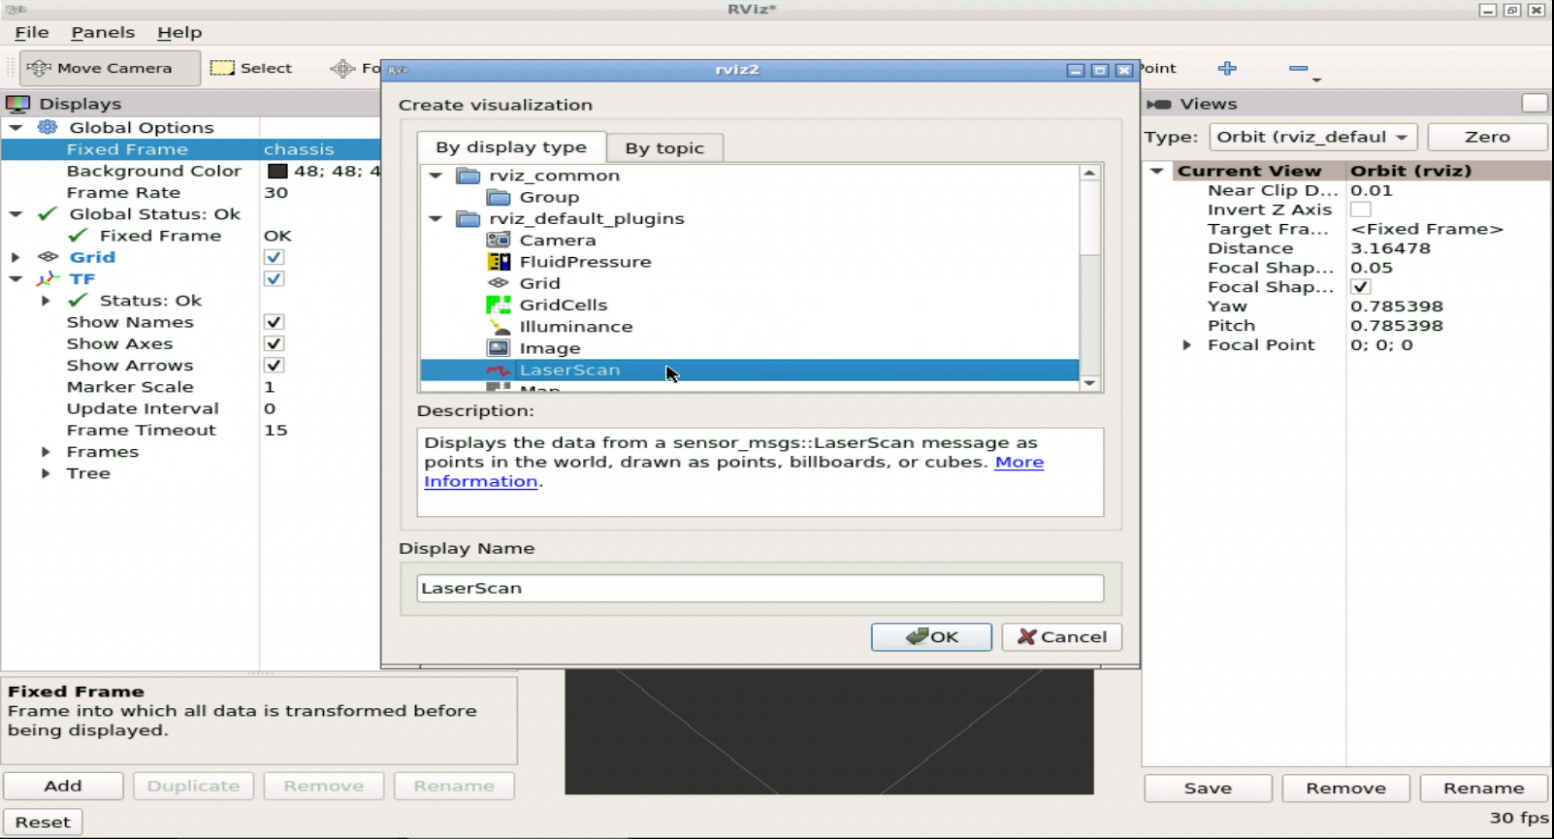
Now it's so important to select the correct topic that is publishing the laser data, in order to visualize it.
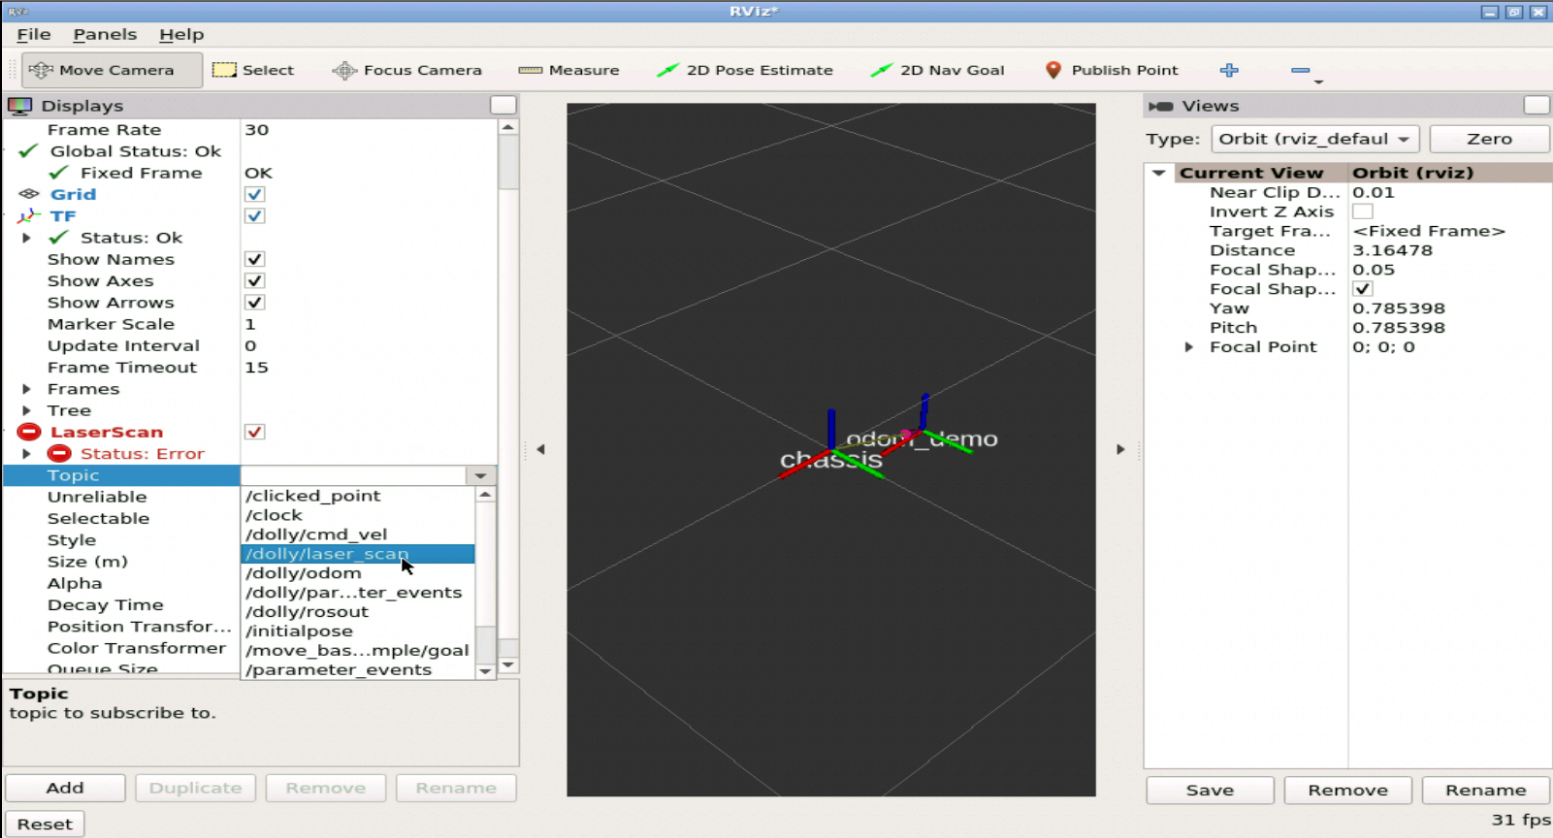
If you follow the configuration bellow you will see the laser data that is detecting the casual female near the robot, take into account that since it is a laser, if objects other than the person would be close, it would also detect them and if they are closer than the person would follow them as if it were the person.
Now let's move the person as you did the class before, and see how RVIZ is visualizing the data according to the movement of the person and the robot, see that as the robot follows the person, the chassis tf will always try to approach in the same way as its initial position with respect to the person and therefore away from its odometry which would be its initial position.
Like the following gif
Mission completed!!
In case you want to become a Master of ROS Development...
Go to our online academy. There is no faster way and funnier to learn ROS because we use the same method we did here.
We call the 30/70 method
- 30% of the time learning theory
- 70% of the time practicing with simulated robots